What is the Clover Flex?
The Clover Flex is a portable, all-in-one point-of-sale device designed for businesses that need flexibility without sacrificing functionality.
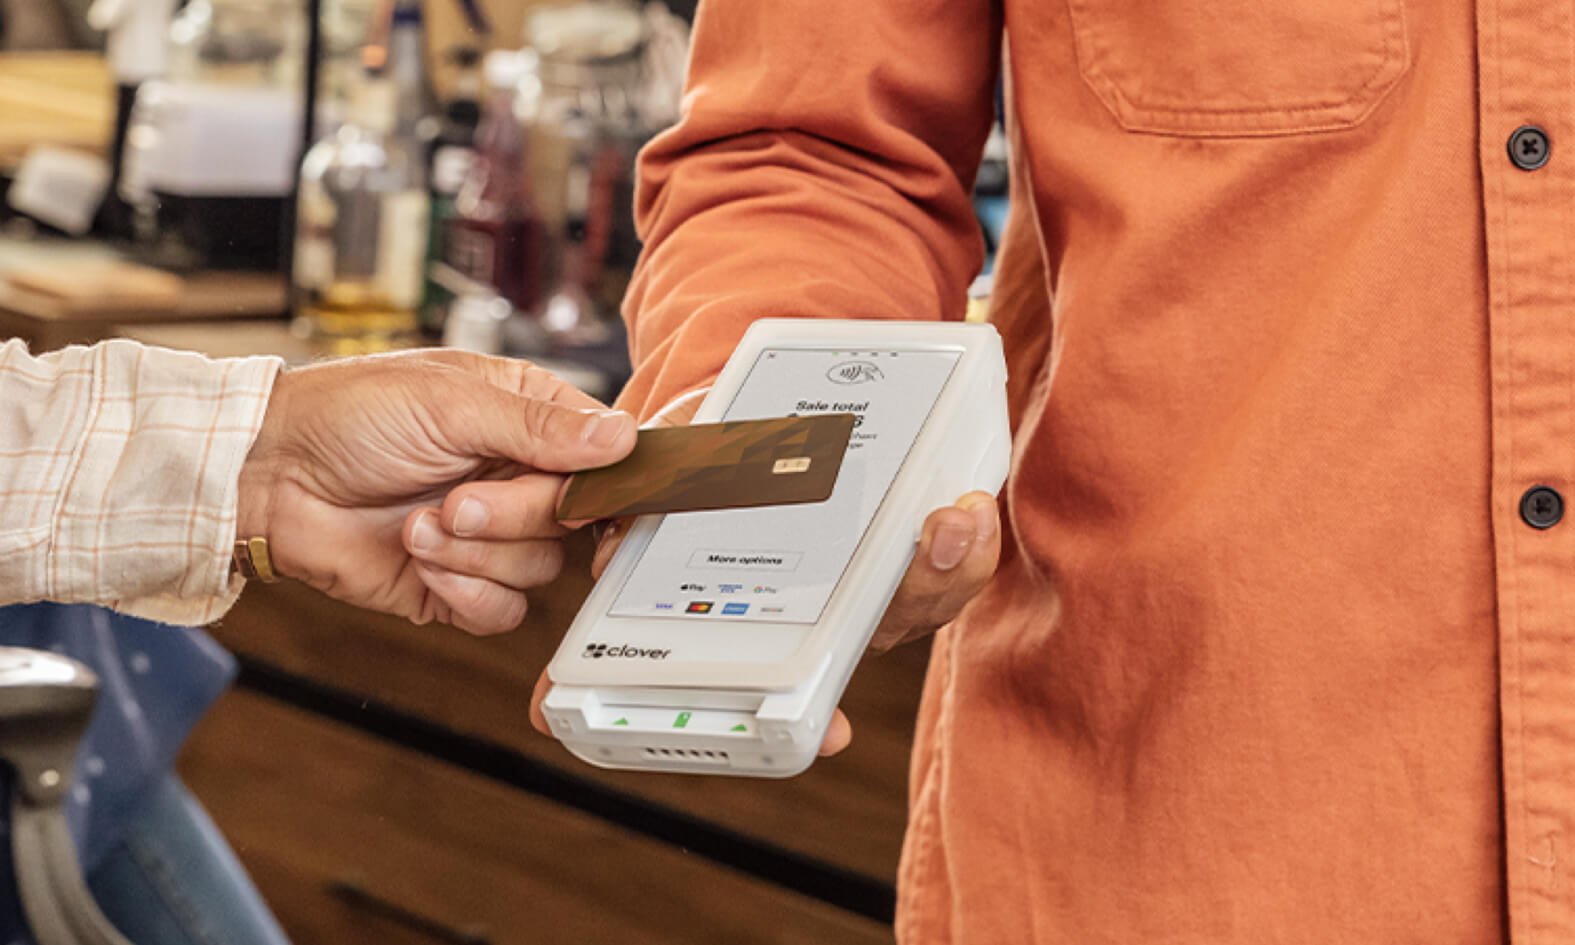
It fits in your hand like a smartphone but comes with everything you need to take payments on the go, including a built-in receipt printer, barcode scanner, touchscreen display, and support for chip, swipe, tap, and mobile wallet payments.
Ideal for retail stores, cafés, service providers, and mobile businesses, the Clover Flex lets you:
Accept credit, debit, and contactless payments
Print or email receipts instantly
Manage sales, refunds, and inventory
Use third-party apps like AlphaPay for QR wallet payments (WeChat Pay, Alipay, UnionPay)
Whether you’re ringing up a customer at the counter or checking them out on the move, the Clover Flex gives you the freedom to run your business anywhere — with the power of a full POS system in the palm of your hand.
How to Use Clover Flex 3
The Clover Flex 3 is a powerful, portable pos device built for modern businesses. Whether you’re processing payments, managing receipts, or integrating new apps like AlphaPay, this guide walks you through the most commonly asked “how-to” questions.
Setting Up a New Clover Flex
Follow these steps to unbox, activate, and start using your new Clover Flex device.
What’s in the box
When you open your Clover Flex package, you should see:
1 × Clover Flex device
1 × Power adapter and USB-C charging cable
1 × Charging Cradle
1 × Silicone Sleeve
1 × Pre-installed paper roll
1 × Quick start guide
1 × Screwdriver for use during the setup process
Payments Accepted Decal
If anything is missing, contact your provider before proceeding.
Step 1: Power on the device
Press and hold the power button on the right side of the device.
Wait for the Clover logo to appear.
The device will boot up and automatically check for any updates. Allow the update to complete if prompted.
Step 2: Connect to Wi-Fi
When prompted, select your Wi-Fi network.
Enter your network password and tap Connect.
Wait for the device to verify and connect.
Tip: A stable Wi-Fi connection is required to process payments and install apps.
Step 3: Activate the device
Enter your activation code when prompted.
You should have received this code via email or from your Clover provider.
Tap Next to complete activation.
The device will load your business profile and assigned apps.
Step 4: Load receipt paper
Open the printer cover at the top of the device by pulling gently.
Insert the receipt roll with the paper feeding up from underneath.
Pull a few inches of paper out, then close the lid until it clicks.
Step 5: Sign in to your Clover account
When activation is complete, you’ll be prompted to sign in.
Enter your Clover admin email and password.
Tap Sign In to load your dashboard.
Step 6: Test your connection and payment flow
Open the Register or Sale app.
Enter a small test amount and process a payment using a card or tap.
Confirm that the payment goes through and a receipt is printed or emailed.
Turn Off or Sleep Mode
To turn off: Hold the power button and tap Power Off.
To sleep: Quickly press the power button once.
To wake up: Tap the power button again.
Tip: If you plan to resume usage soon, you can also put the device into sleep mode with a quick press of the power button instead of full shutdown.
Charge Your Clover Flex
Option 1: Charging Cradle
Insert the power cord into the bottom of the cradle.
Plug the adapter into a wall outlet.
Place the Flex on the cradle.
A battery icon will appear once it’s connected.
Option 2: Travel Kit Charger (USB-C)
Plug the USB-C cable into the port at the bottom of the device.
Connect to a Clover-compatible travel charger (sold separately).
Device Features
Sound & Notifications
Flex 3 has a built-in speaker for alerts.
For noisy environments, you can plug in an external speaker via the 3.5mm audio jack.
Adjust volume via: Settings > Notification Settings.
Barcode Scanner
Use the left-side trigger button to scan UPC or QR barcodes.
Scans directly from product labels or digital displays.
How to Process Credit & Debit Cards
From the home screen, open the Sale / Register app.
Enter the amount (or select items) and tap Charge.
Ask the customer to insert, swipe, or tap their card on the reader.
Follow on‑screen prompts to complete the transaction.
Choose to print, email, or skip the receipt after payment.
How to Void a Transaction
A void can be done only before the daily settlement:
Go to Transactions in the menu.
Find the transaction you wish to void.
Tap it, then select Void.
Confirm the action to cancel the transaction.
If the transaction has already been settled, you will need to issue a refund instead.
How to Process a Refund
Open the Transactions app.
Find and tap the transaction to be refunded.
Select Refund.
Specify full or partial refund amount and provide reason (if prompted).
Complete the refund. You can offer a receipt to the customer.
How to Change the Receipt Paper
Gently pull open the receipt paper compartment at the top of the device.
Remove any old paper roll.
Insert the new roll so that the paper feeds up from underneath (not over the top).
Pull out a few inches of paper, then close the compartment until it clicks.
The printer will detect and align the paper automatically.
Rebooting Your Clover Flex
Soft Reboot
Swipe down from the top right corner > tap Reboot > confirm.
Hard Reboot
Remove device from cradle / unplug it.
Hold power button for 32 seconds.
Release, then press again to restart.
Reconnect to power and log in.
Installing the AlphaPay App on Clover
If you’d like to accept WeChat Pay, Alipay, or UnionPay, the AlphaPay app is available in the Clover App Market free to install.
On your Clover Flex 3, open the Clover App Market.
Use the search bar and type AlphaPay.
Select the AlphaPay app from the results.
Tap Install.
Once installed, open the app and follow the setup prompts to connect your AlphaPay account.
After setup, your device can process wallet payments alongside regular card transactions.
Still Need Help?
If you’re having trouble with your Clover Flex setup or AlphaPay integration, feel free to reach out to our support team.